Hover Over Element
In this section, we will guide you on how to use the Hover Over Element step.
Purpose
This step is used to simulate hovering the mouse pointer over elements on a webpage. It typically triggers hidden menus, information panels, or other interactive features.
Common use cases:
- Trigger menu display:
- Hover over navigation menu items to display submenus.
- Hover over column headers in tables to display sorting or filtering options.
- Hover over charts to display detailed information about data points.
- Trigger information panel display:
- Hover over avatars to display user information panels.
- Hover over icons or buttons to display tooltip information.
- Hover over fields to display explanatory text for that field.
- Trigger other actions:
- After hovering over an element, automatically proceed with the next action, such as clicking or typing.
- Trigger custom events, such as playing animations or displaying pop-up windows.
Configuration
General

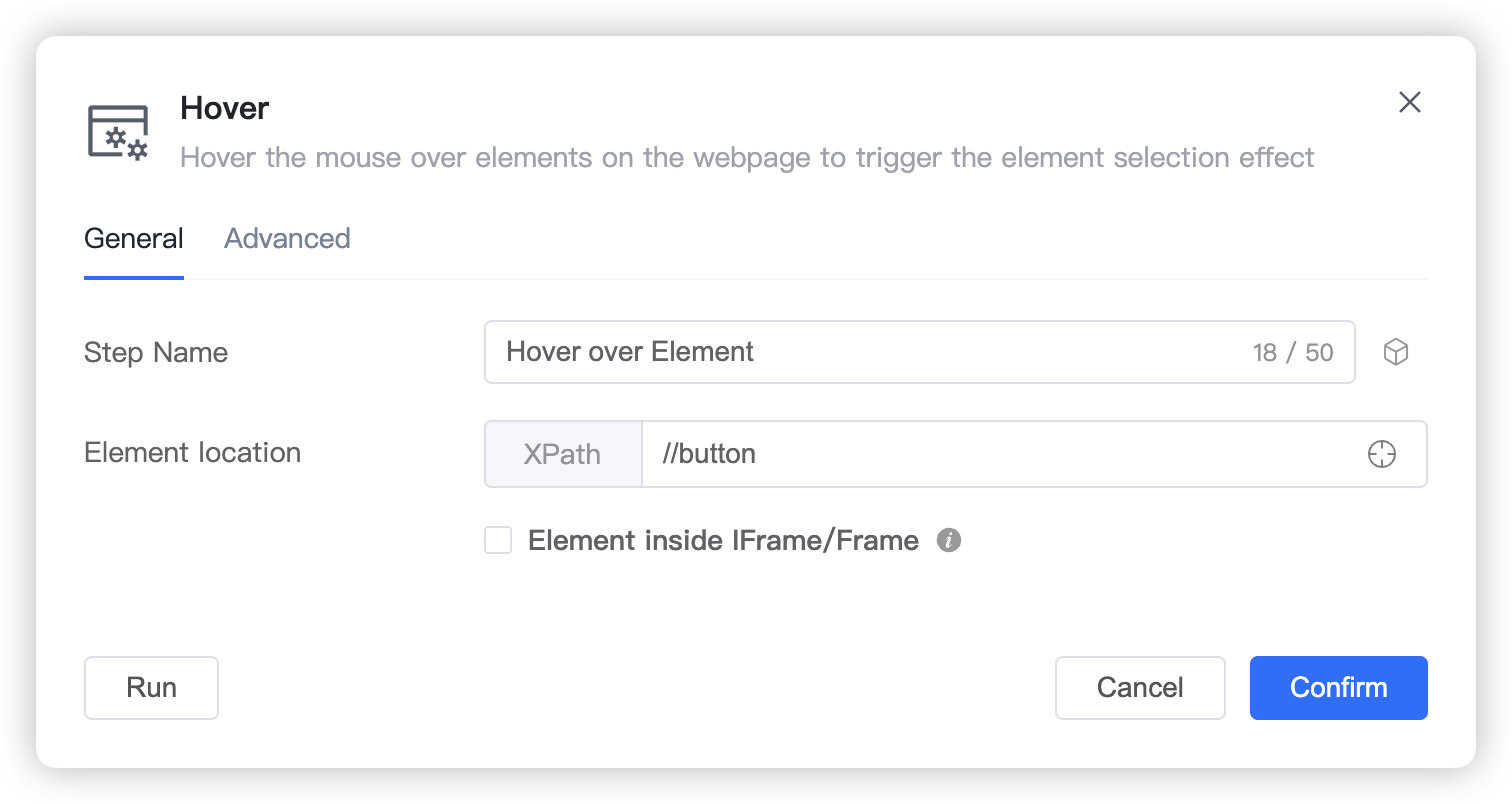
Step Name: Custom step name.
Element Location: Configure the location of the element to hover over using an XPath expression.
- Element is in IFrame/Frame: If the element to hover over is within an IFrame or Frame, check this option and configure the XPath location expression for the IFrame itself (relative to its root node
<html>,<iframe>,<frame>tags).
TIP
If the root node IFrame is also nested within other IFrames, you need to configure all IFrames in order, up to the outermost IFrame (whose root node is the
<html>tag). Configure them in order from top to bottom, with the last one representing the outermost IFrame element.- Element is in IFrame/Frame: If the element to hover over is within an IFrame or Frame, check this option and configure the XPath location expression for the IFrame itself (relative to its root node
Advanced

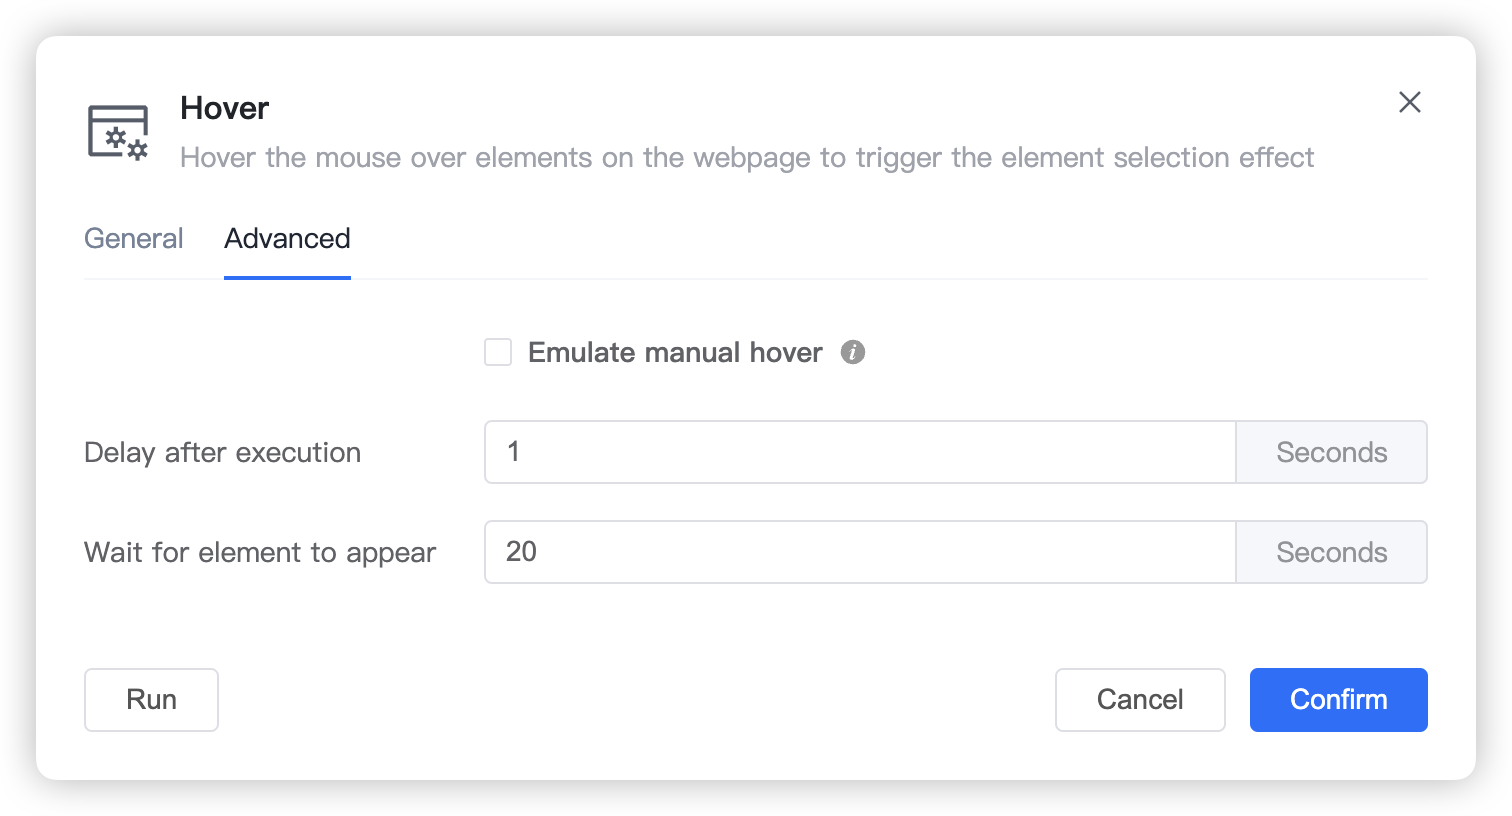
- Simulate Human Hover: When enabled, this will simulate actual hardware operations of human mouse movement and hovering.
TIP
If hovering over elements on certain websites doesn't work with the default method, try enabling this option. Since this method simulates real mouse operations, it requires the element to be hovered over to be visible on screen, otherwise inaccurate positioning may cause the hover to fail.
Delay After Execution: The waiting time after performing the hover over element operation.
Wait for Element to Appear: Before performing the hover over element operation, wait for the target element to appear, configuring the maximum waiting time.
TIP
The default waiting timeout is 20 seconds. If a particular element takes longer to load and appear on the webpage, you can adjust this setting for a longer waiting time. If the element appears earlier, the click operation will be executed immediately without waiting for the timeout.